What a week! Living in the Rocky Mountains is always a surprise when it comes to the weather. Anyone who lives here understands that we rarely have smooth transitions from one season to the next. Instead, we usually have a month or two where each week seems to be a different, random season. One week it is highs in the 80’s and then the next week it 5 inches of snow. This type of weather can be a nightmare for gardeners in the spring and fall when we are trying to get our gardens either started or harvesting from them. Because of this, we need to be fast to act and sometimes we don’t get to decide when we are harvesting from our gardens. Sometimes that is decided for us.

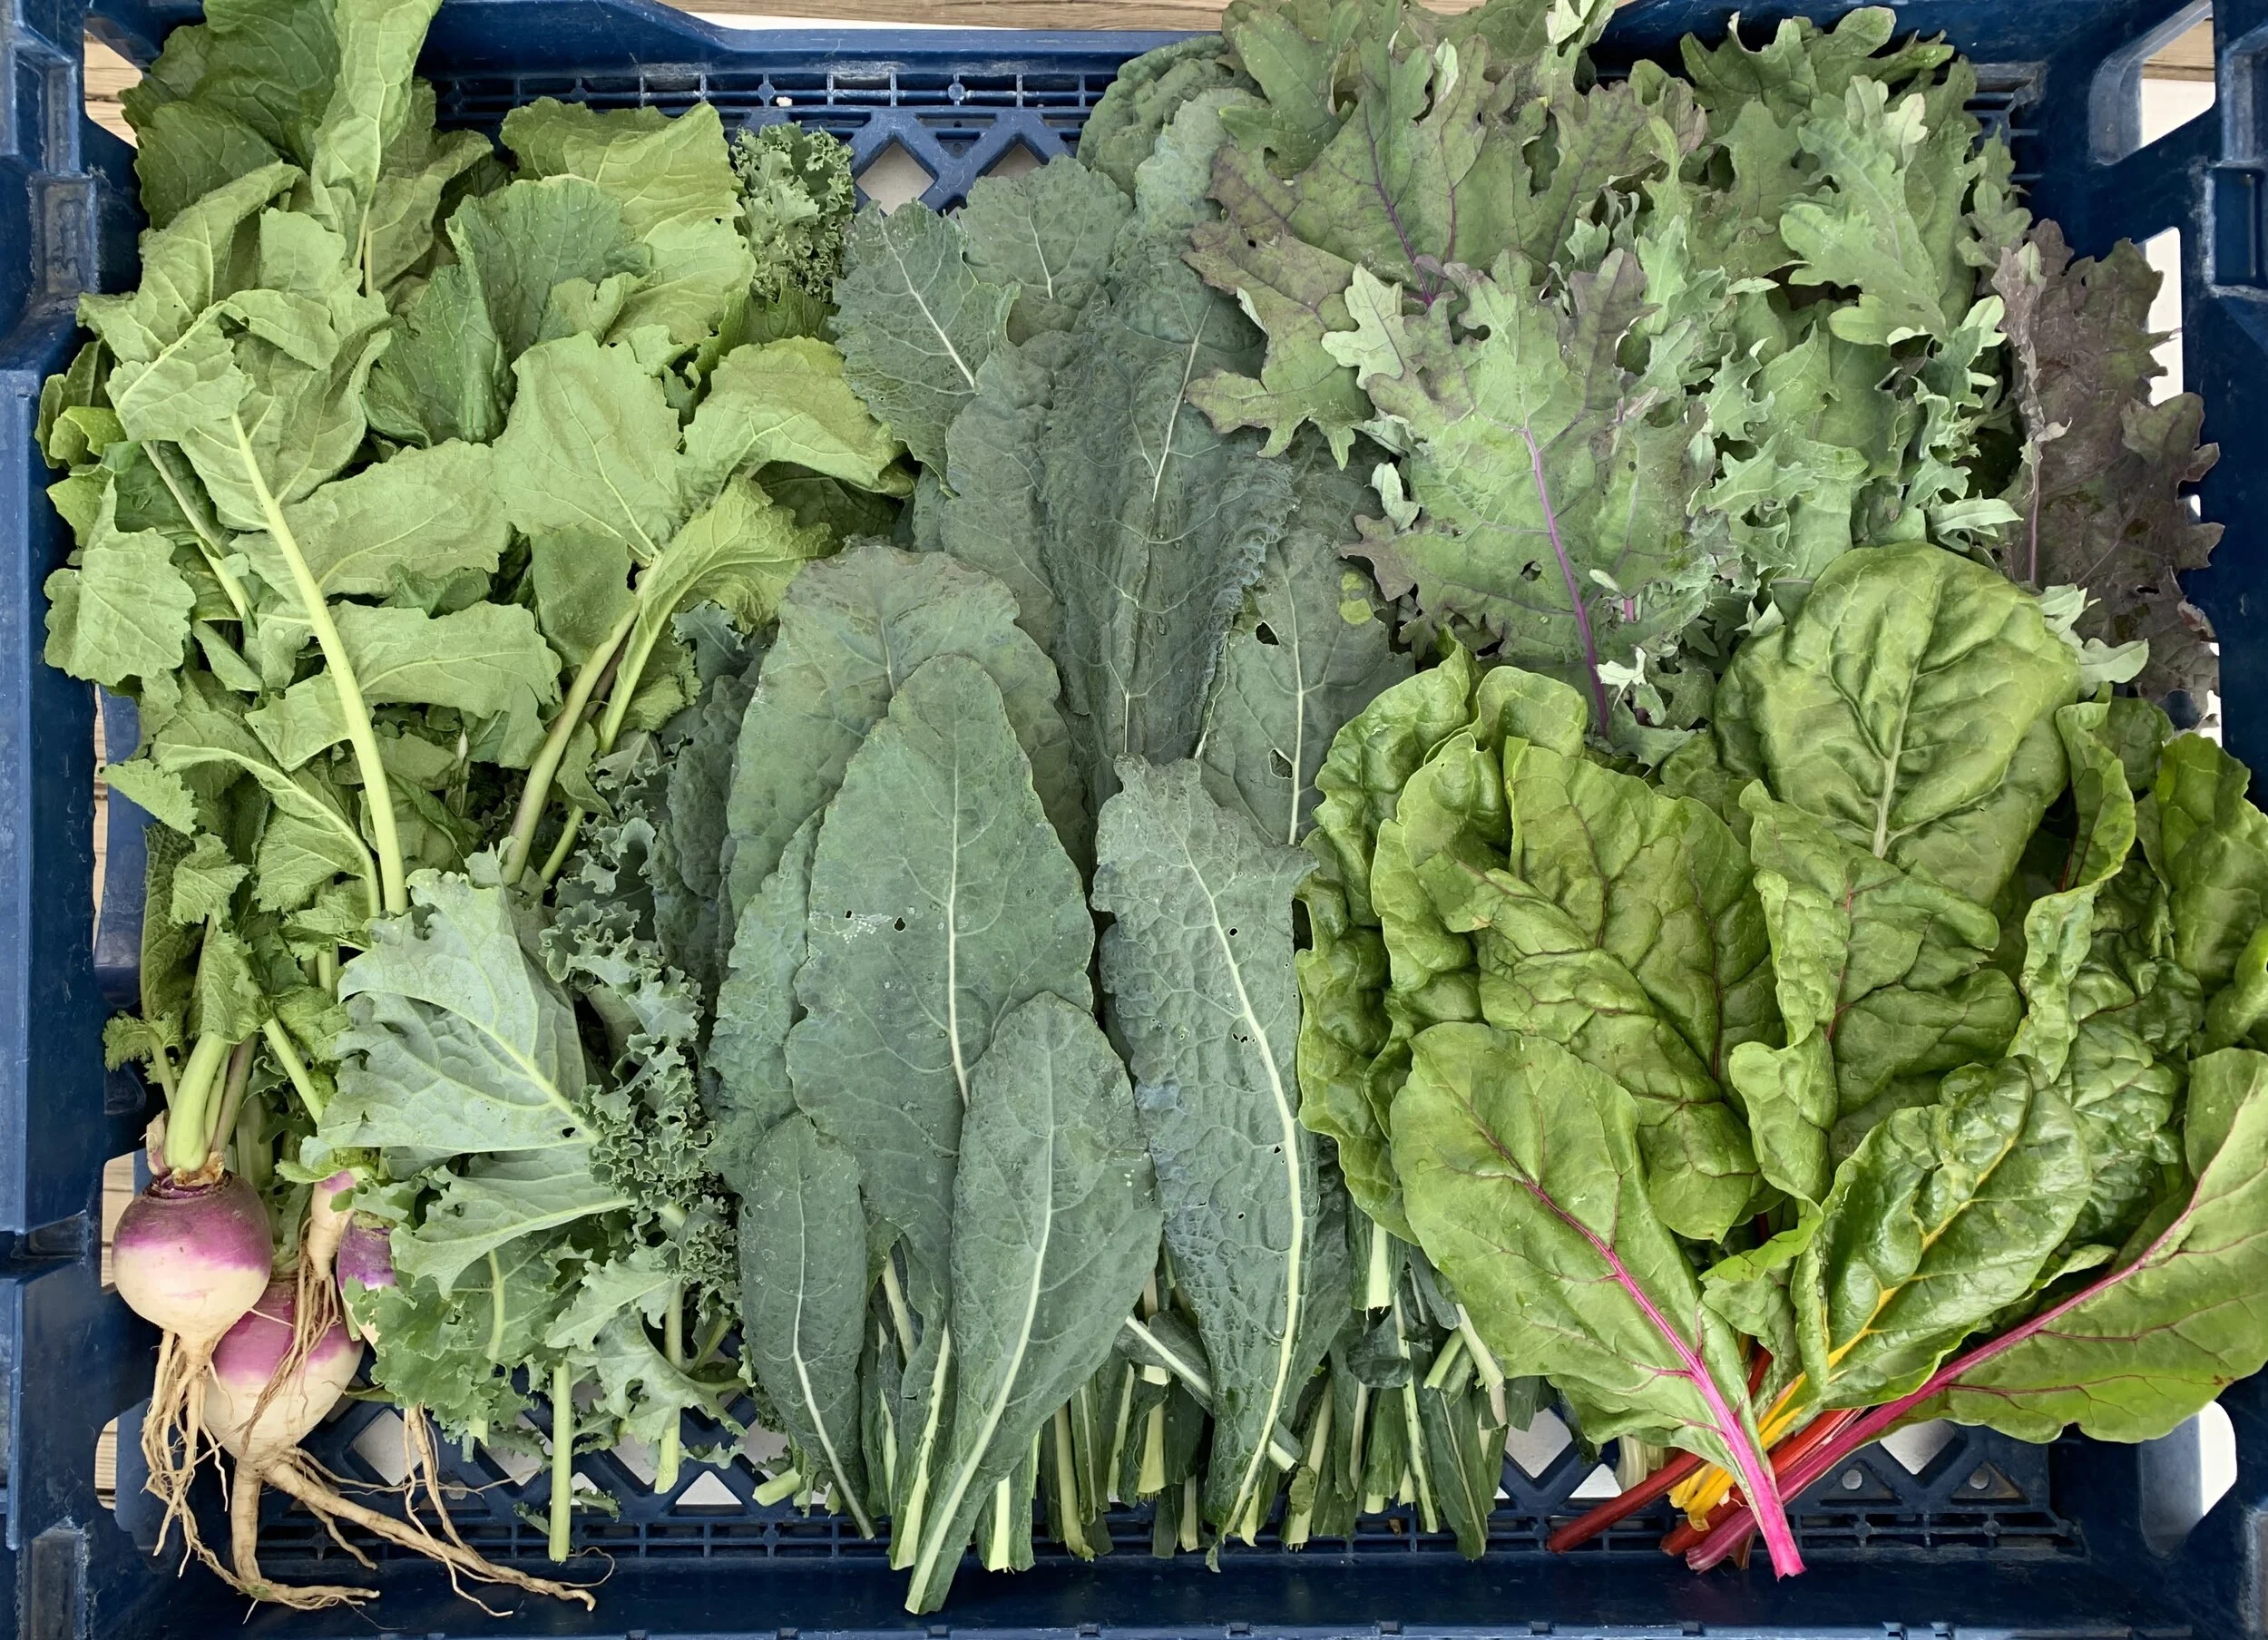
Sudden harvesting can leave us with a lot more fresh produce than we know what to do with. In this case, it is good to understand techniques that we can use for storing these veggies so that we can eat from our garden throughout the year. In this blog, I will not be looking at canning or pickling, but rather freezing and other techniques to store your veggies.
How to store what:

The first thing that you need to know when trying to store your excess produce is how the vegetable be stored. Probably the easiest question to first ask is whether this vegetable can be frozen or not. Many veggies can be frozen like peas or broccoli. However many root vegetables do not freeze well, and are better stored in different conditions. Let’s talk about freezing veggies first.
Freezing:

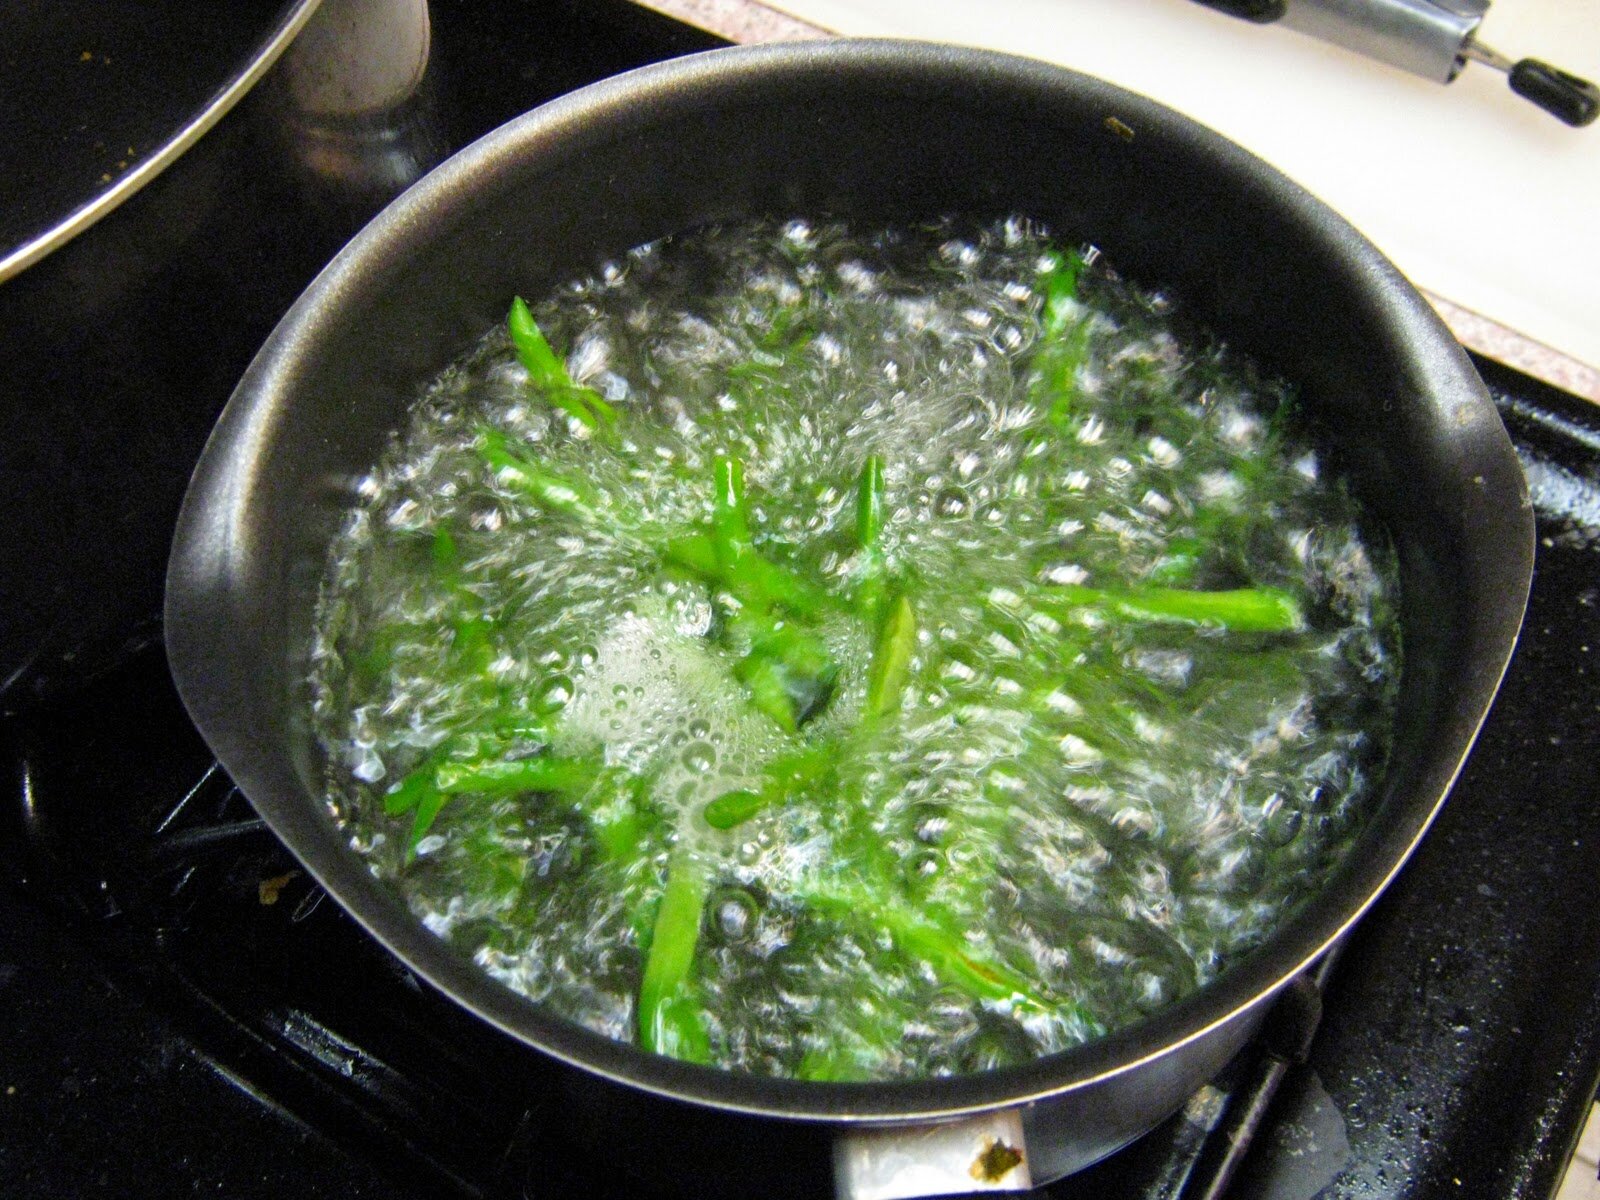
Freezing your extra harvest is one of the easiest ways to preserve your harvest, through the winter. There are also very little nutrients lost through the freezing process, which makes it one of the more attractive options for vegetable storage. Though freezing is one of the most straight-forward storing processes, it is a bit more complicated than just sticking a leaf of kale into the freezer. The issue with freezing veggies this way is that they will still continue to decompose and rot in your freezer. Every veggie is naturally coated with an enzyme that facilitates the decomposition of the plant (its actually a pretty cool adaptation of the plant to help its nutrients return to the soil). This enzyme survives, and will continue to operate in freezing temperatures, but it can’t survive high heat. This is why we blanch our veggies before freezing them. Blanching is a fancy term for boiling them for a short time. Boiling the veggies for a short period of time destroys the enzyme responsible for rotting, but it preserves most of the veggies nutrients and texture that they have when they are raw.
Steps for blanching:
1) Washing the veggies
You want to make sure that the veggies are thoroughly washed before you begin the blanching process. For cabbages, you will want to submerge them in water for 30 minuets to get rid of any critters that might be hiding between the leaves.
2) Chopping up the veggies
With this step, you want to prepare the veggies for how they will be frozen. This includes cutting off any stemmy sections since these do not freeze well. Remove any damaged parts of the veggies. With cabbages, you want to remove the outer most leaves.
3) Cook the veggies
Place the cut up veggies into a pot of boiling water or a steamer basket above boiling water for the length of time required for each veggie. Here are some times for common veggies.
· Artichoke Hearts: 6 minutes
· Asparagus: 2 to 4 minutes depending on the stalk thickness
· Beans (Green or Wax): 3 minutes
· Broccoli (cut into 1-inch pieces): 2 minutes
· Brussels Sprouts: 3 to 5 minutes, depending on size
· Cauliflower (cut into 1-inch pieces): 3 minutes
· Kohlrabi (cut into 1-inch cubes): 1 minute
· Leafy Greens: 1 to 2 minutes (use the longer time for collards and cabbage)
· Pea in the pod: 2 to 3 minutes, depending on size
· Peas shelled: 1.5 minutes
· Summer Squash: 3 minutes
4) Cool the veggies
Immediately after cooking the veggies, you want to cool them down. Either run them under cold water or submerge them in an ice bath. You want to stop any residual cooking.
5) Drain the water
After cooling them, you want to drain as much water as possible before they go into the freezer. With leafy greens, you will want to squeeze out as much water as you can.
6) Bag them and freeze them
Once they are drained you want to bag them. Remove as much air as possible from the bag and label the date so that you can know how long they have been in the freezer. Then put them in your freezer, and enjoy at a later date.
Roots:

This technique of blanching and then freezing veggies is a great way to store a number of varieties of vegetables, but it doesn’t work for everything. Particularly root vegetables. Luckily, root vegetables when stored properly can last for a very long time. Now the ideal storage conditions for most root veggies is in a root cellar. Unfortunately, most of us do not have access to a root cellar, but this does not mean that we can’t store our root veggies in an effective ways. Without a root cellar, we need to be more intentional about how we are storing each root veggie because they all have different conditions that are optimal for them.
There are two things that you want to keep in mind regardless of what veggie you are working with. Firstly, you want to find a place where they will not freeze. Roots that have been frozen and then thawed will not store well. You also want to handle them carefully and remove any damaged ones. This is because bruised veggies will rot faster, and this rot will spread to other roots that are touching them.
Carrots, beets, and turnips
Start by removing the tops. If the leaves are left on, they will draw moisture away from the roots. These roots prefer temperatures between 32˚F - 40˚F and store best when buried in damp, but not wet, sand. You want to take a container and fill it with a row of veggies that aren’t touching and then bury them in sand, then add another row. You want to keep this sand damp, to prevent the roots from drying out, but if it is too wet them will start to rot. These veggies also like high humidity when you store them. You can also use saw dust or wood chips if you cannot find sand.
Potatoes
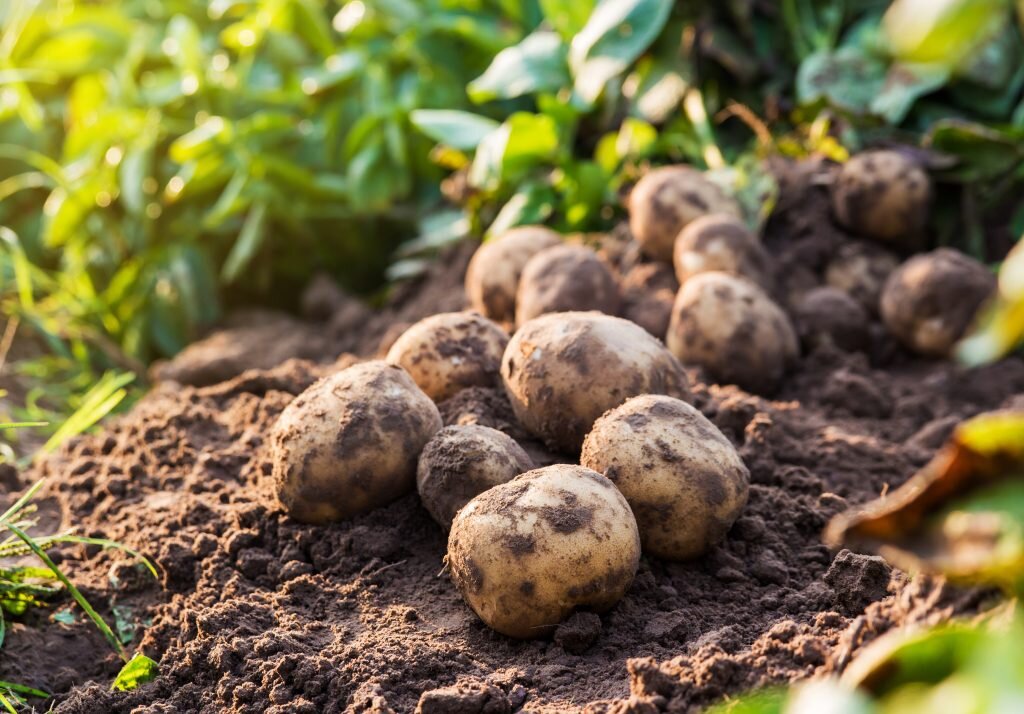
Potatoes are a staple of this valley. For long term storage of them, you want to start out by drying them after harvest. They will be dry within an hour or two of harvest, so this does not take a long time. Next, you want to clean them off. Do this by brushing them off, not by washing them. Once they are brushed off you want to remove any bad or bruised potatoes to ensure that rot doesn’t spread to others. Once you have your potatoes that you are going to store, you want to find a cool and dry location. Potatoes like temperatures between 35˚F-40˚F. Store them in a container that is dark. This could be a box or a cotton sack. It can be helpful to put a layer of newspaper in between your potatoes as you layer them in.
Garlic, shallots and Onions.

With these bulbs, dryness is more important than temperature. You want to make sure that after harvesting them they have had ample time to dry out. For this, you want to hang them up either by their greens, or in a basket (pantyhose can work well for this) for two to three weeks. Once they have dried, you can either continue to store them where they are or you can move them to a new location. As long as they are stored somewhere dry with good airflow they will be fine.
There are many elements of gardening that make it an enjoyable activity; the therapeutic element of green spaces, the fresh air from being outside, and the pride in stewarding something and watching it grow. These are all amazing things that we get from gardens, but beneath all of this is a utilitarian element of providing food for ourselves, and it is our job to know how to best utilize this food. This involves understanding techniques to store our harvests, because one of the saddest things in this world is to watch good vegetables go to waste.